
How to Make a Word Template
(or more specifically, how I use and make Word Templates to streamline my note-taking process) What is…

(or more specifically, how I use and make Word Templates to streamline my note-taking process)
What is a template?
– A template is a pre-formatted document that you can modify and save for yourself. Microsoft Word comes with a number of general templates (like “newsletter” or “resume”), but let’s look into how to make one that caters to your needs perfectly.
– It is a special file type called a .dotx (as opposed to a Word doc, which is a .doc or .docx) and it can be reused as many times as you want.
Why bother with templates?
– For me, templates are useful because they save time. I don’t want to constantly reformat a document (to make it the font size, type and style) that I want, and when I’m working on something that’s a long-term project, like compiling notes for an exam based on a topic list, it’s nice to not have to reformat it constantly.
– It makes my notes more organized and cohesive, and the uniformity helps me when I’m reviewing the notes later.
How to get started:
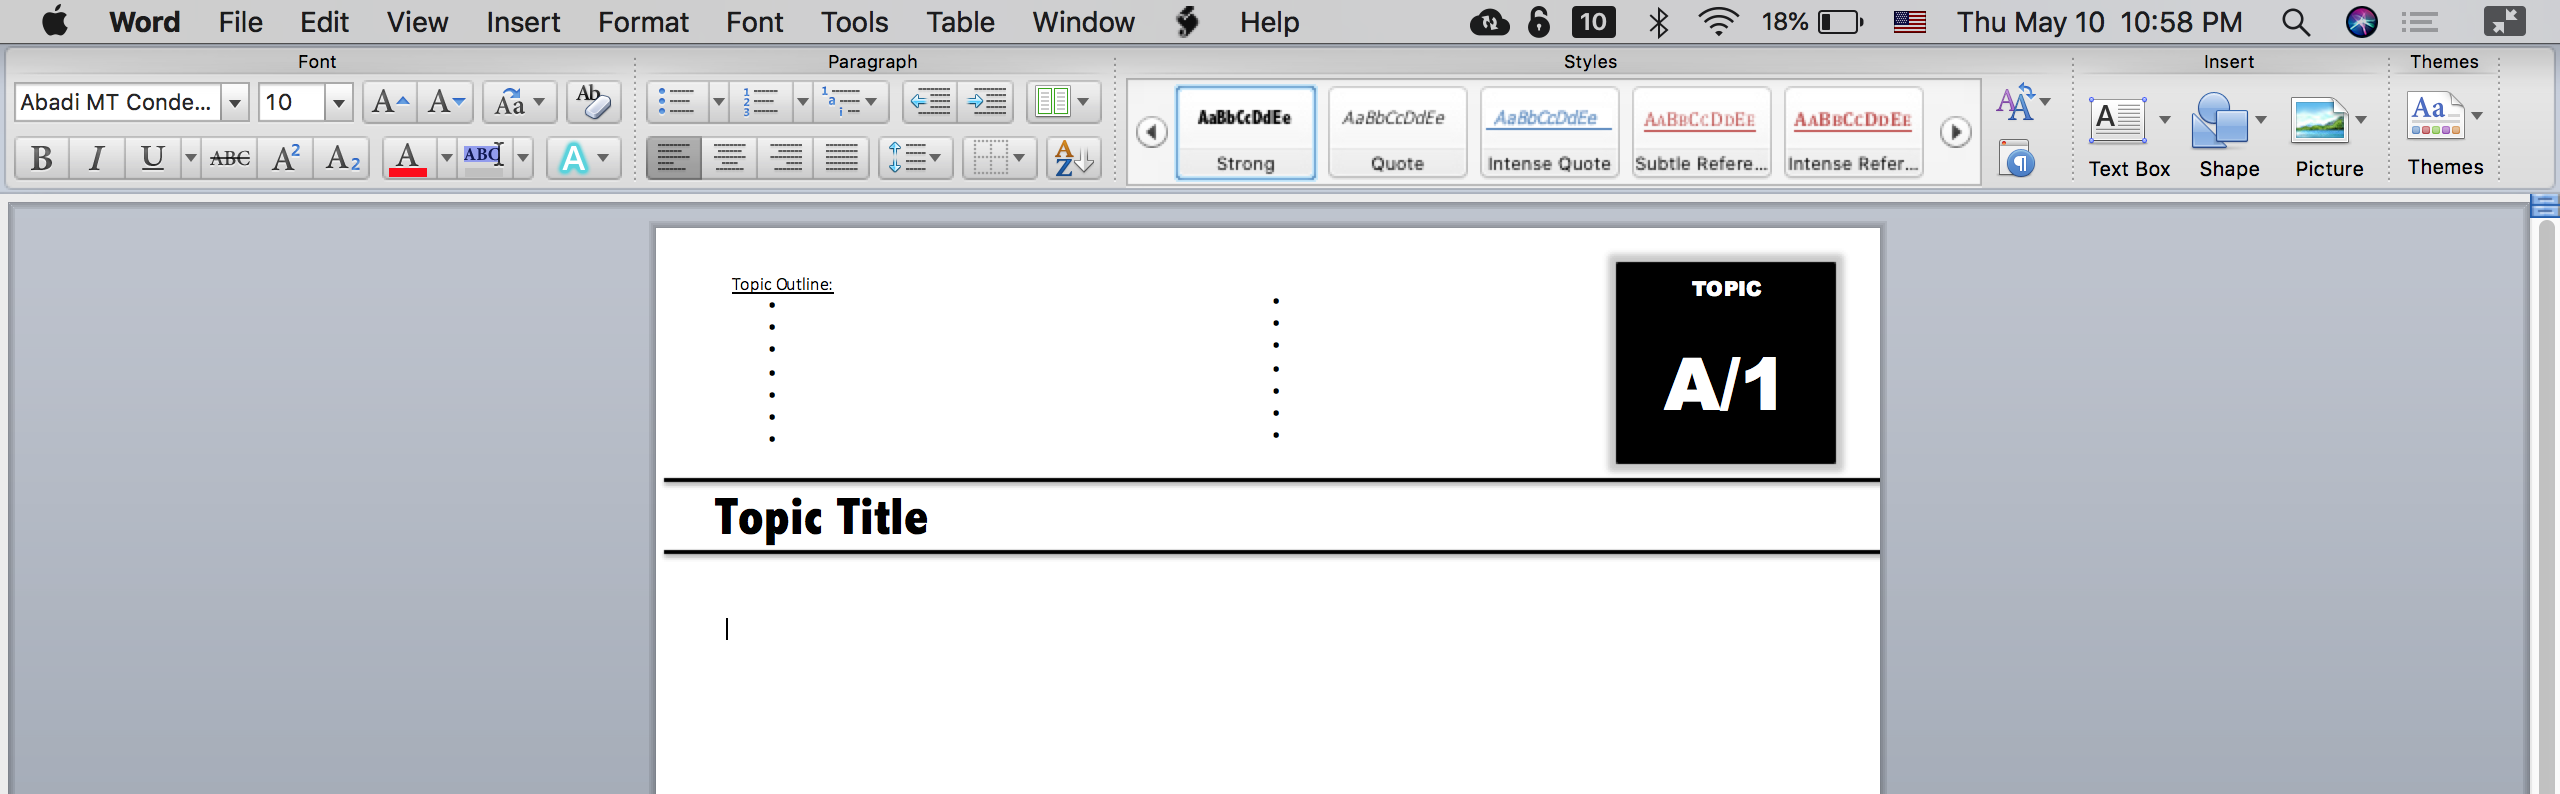
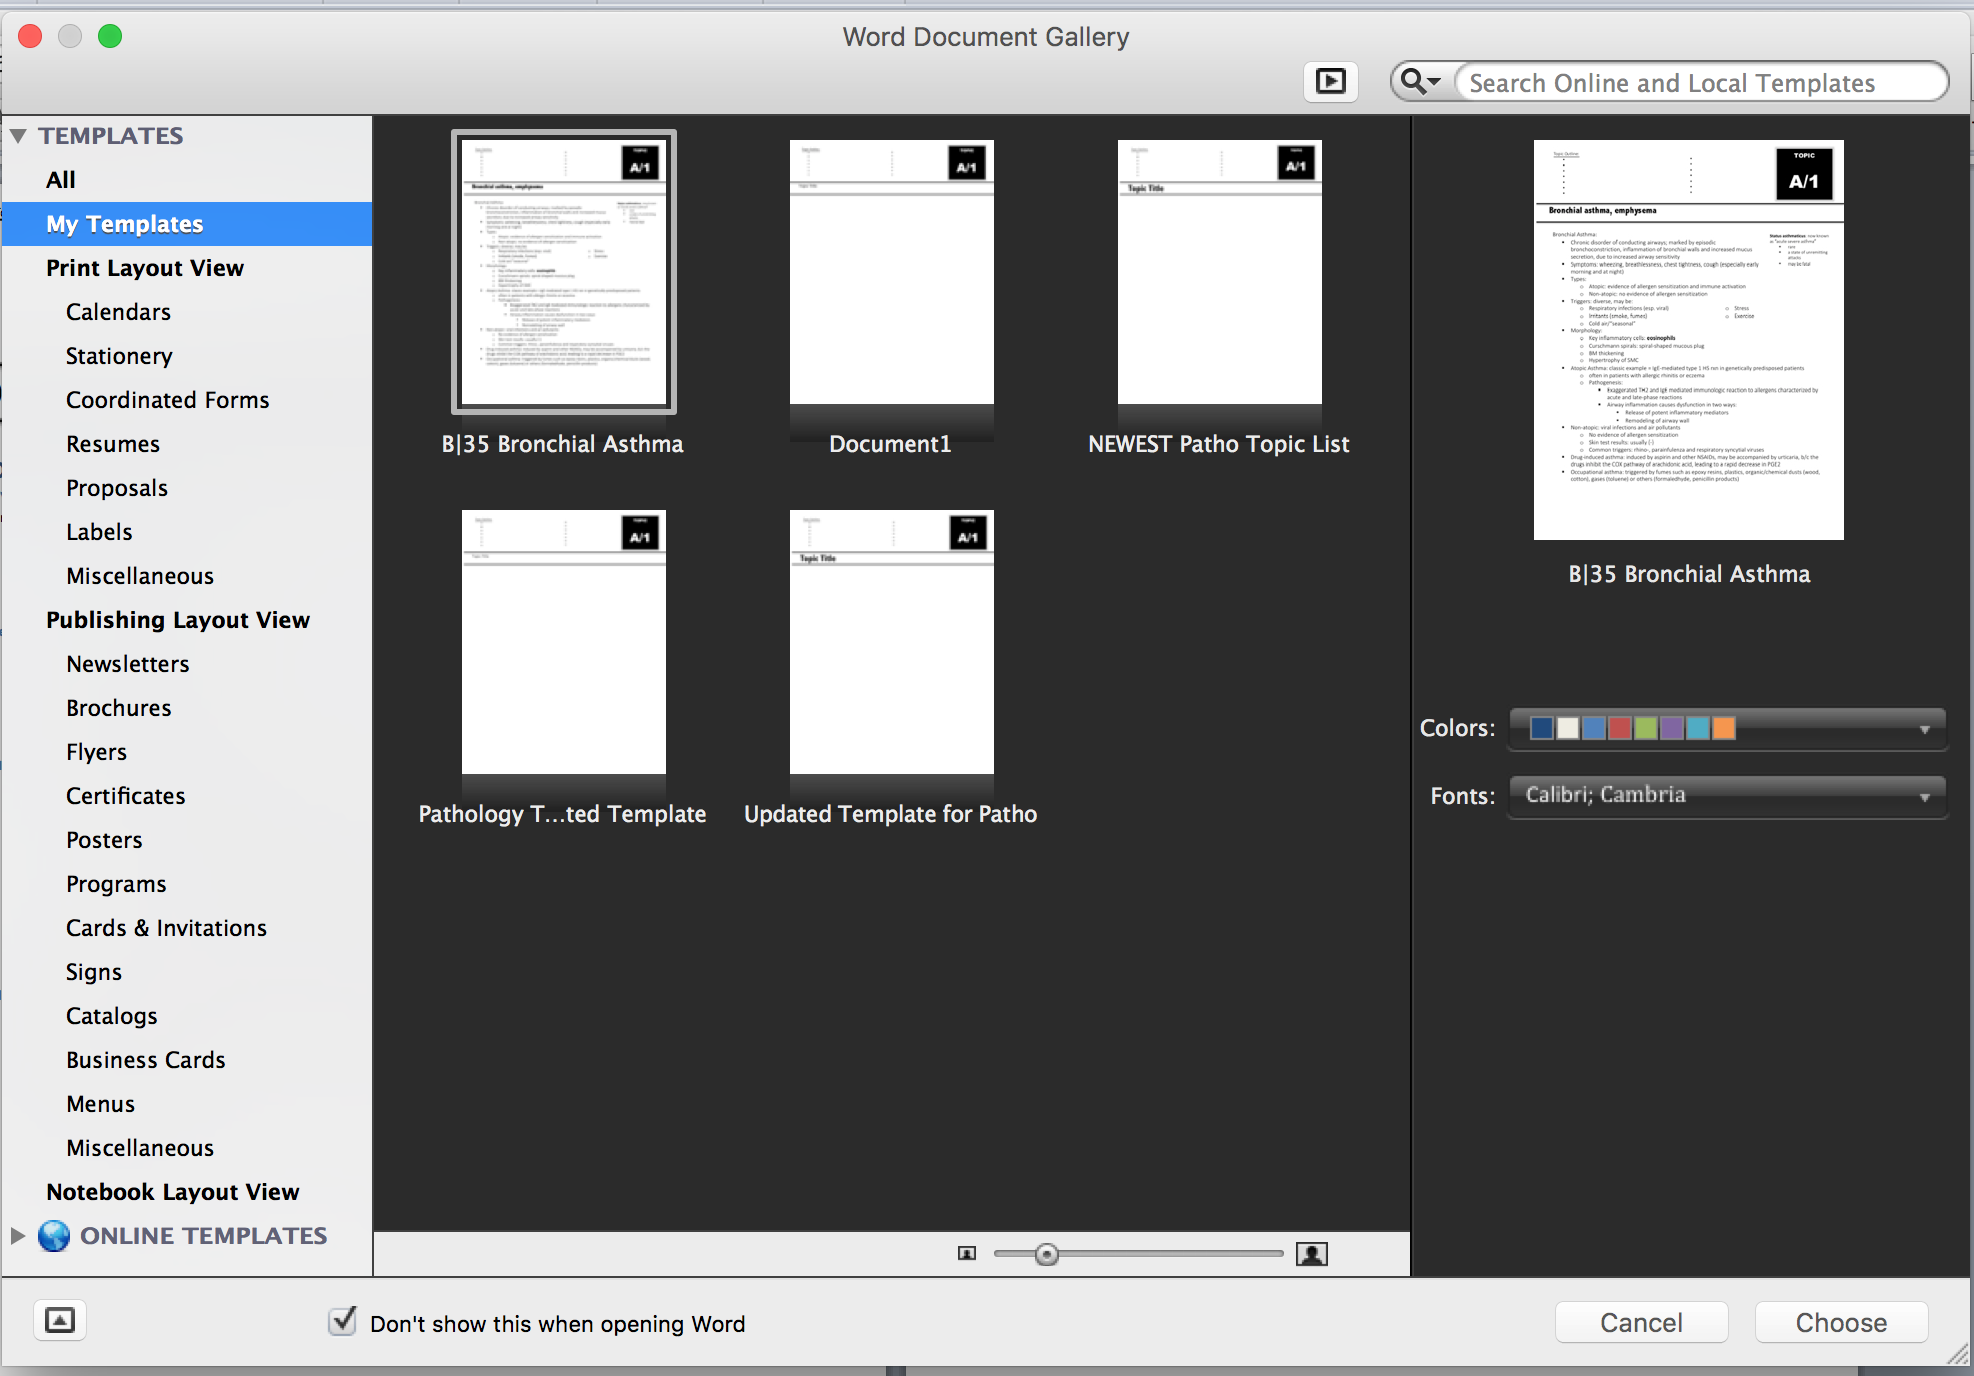
– figure out what you need. Mine, as you can see below, is quite simple. It has the topic #, topic title, space left for adding in an outline when I’ve made the notes, and desired font size/style, etc.
This is the template I made for myself:
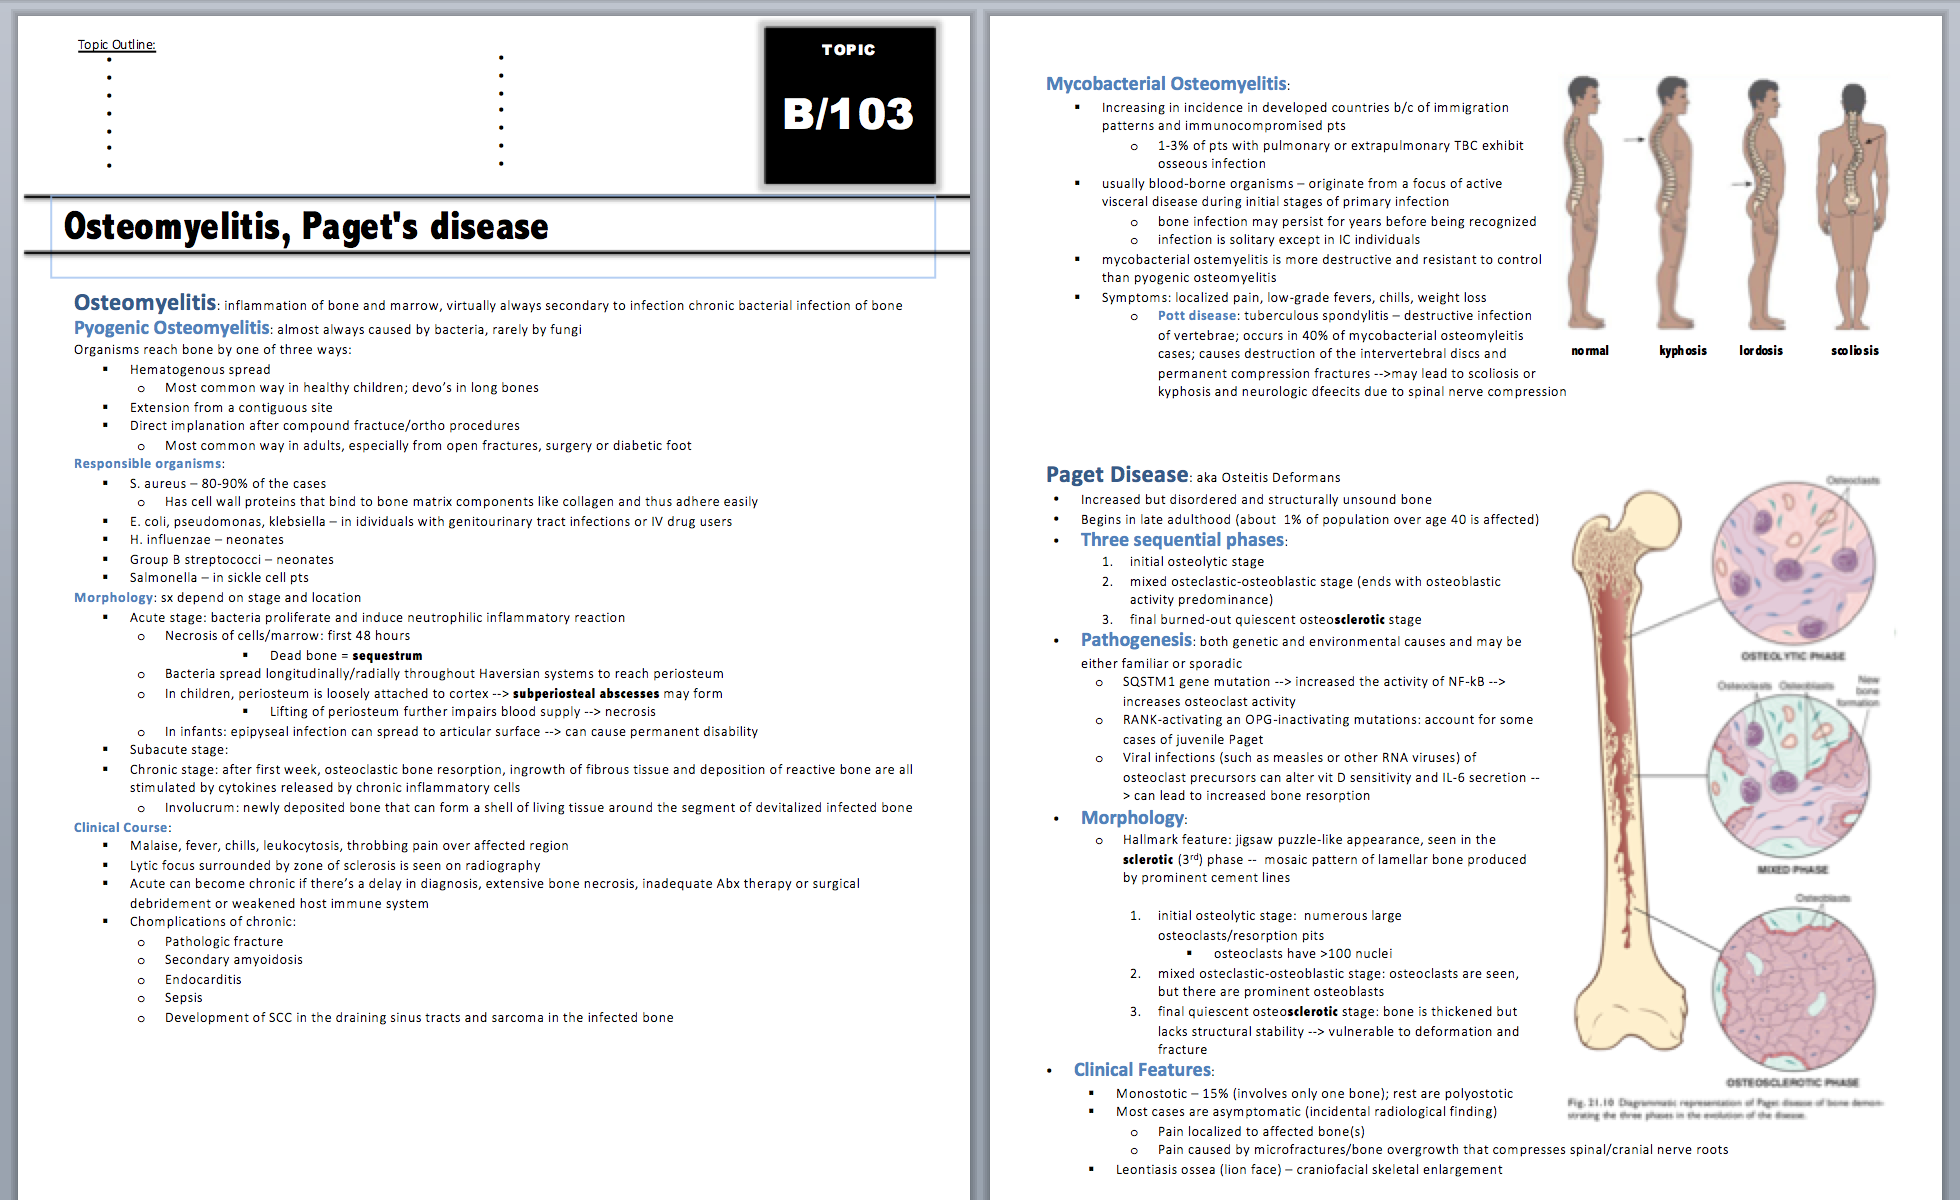
And here’s what it looks like in action.
How to MAKE your template:
For yourself, I recommend starting with an idea of what you want. For sake of ease, I added all these items into text-boxes that I could drag around and reposition.
So: do you want page numbers? Add a footer. Do you want your name and subject in the upper right hand corner? Add a text-box in!
1. Add all the items you want on your template into text boxes and reposition them as desired.
2. Adjust the size, font, style.
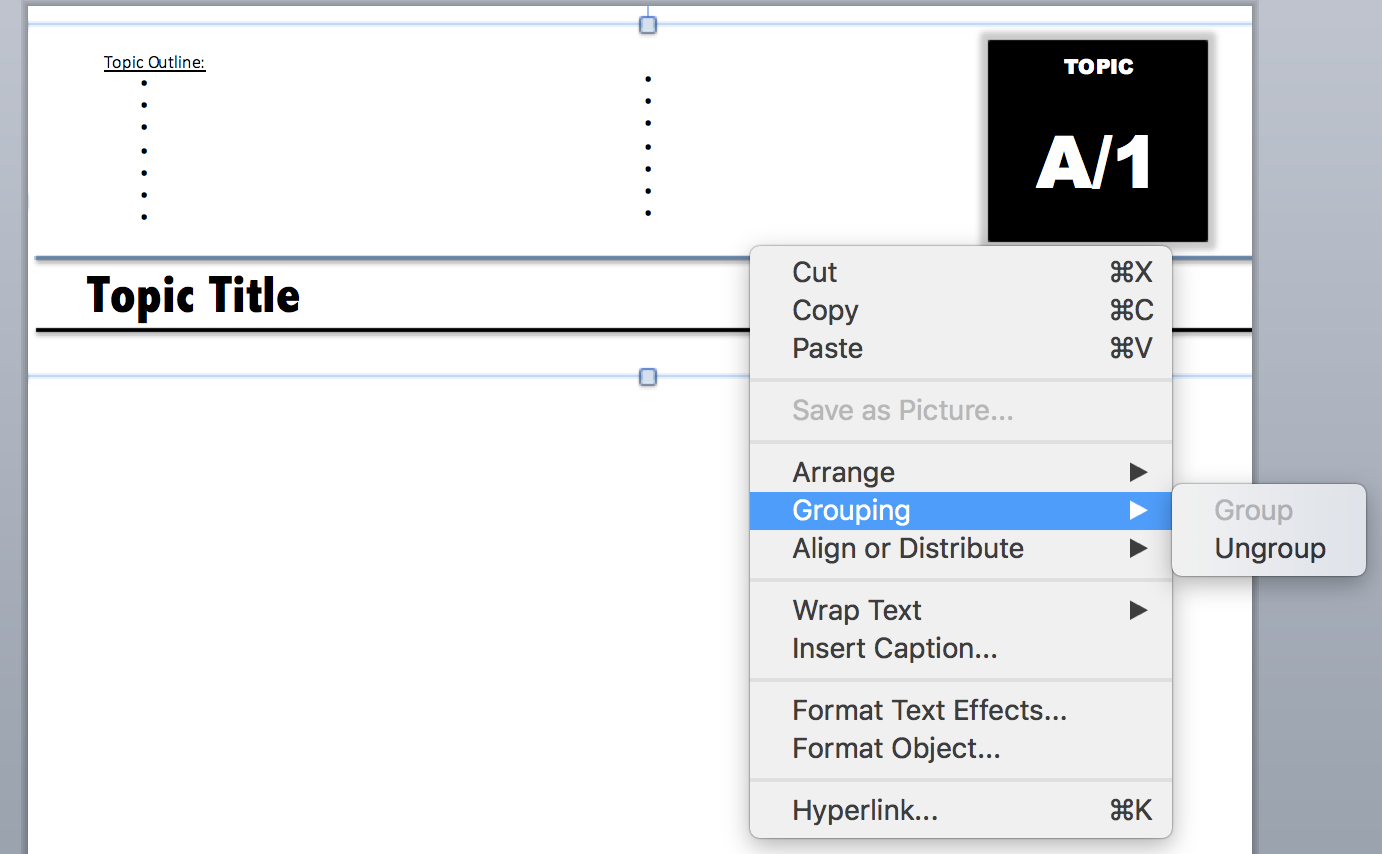
3. Group the items together. To do this, press and hold “ctrl” and left-click on each item/textbox. Then, let go of the “ctrl “key and right click over one of the text-boxes, and select “Group.” Now you’ll notice that you can move all the text-boxes and shapes as one large, combined item.
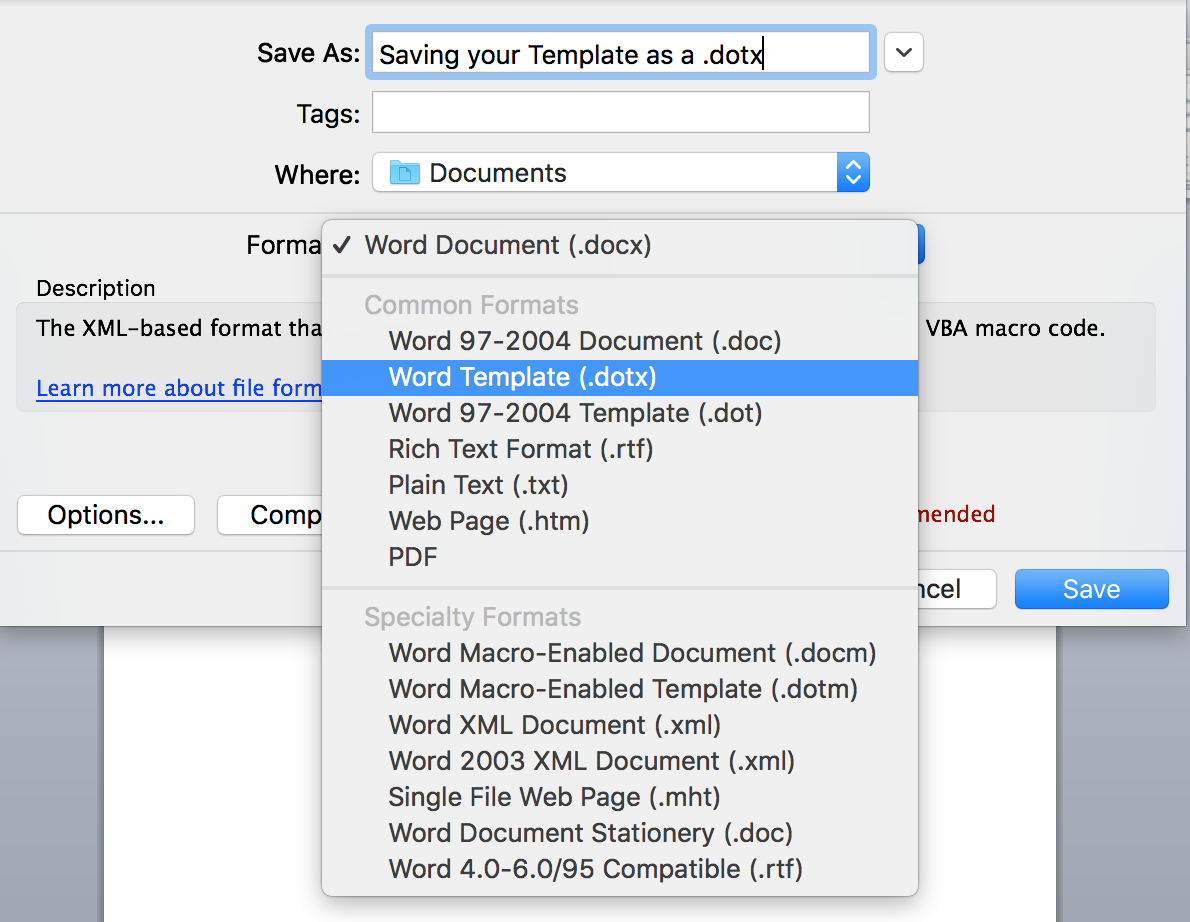
4. If you’re all done, then click on “File –> Save As” and from the drop down menu, select “.dotx” as your extension (this part is the key to making templates!).
How to USE your template:
Now, how do you actually use your template?
Go to Word, select “File –> Open from Template” and find your template.
[Alternatively, within Word, use the following key combination: ctrl+shift+P, which stands for “open new from template.]
Click “choose” and start typing.
Now, when you save your work for the first time (make sure to save often!), it’ll prompt you to enter a file name, and you’ll have made a new note document without affecting the template at all.
There you go, you’re all set!
P.S. I’ve shared this super simple template in a public folder on my Google drive, feel free to use it.